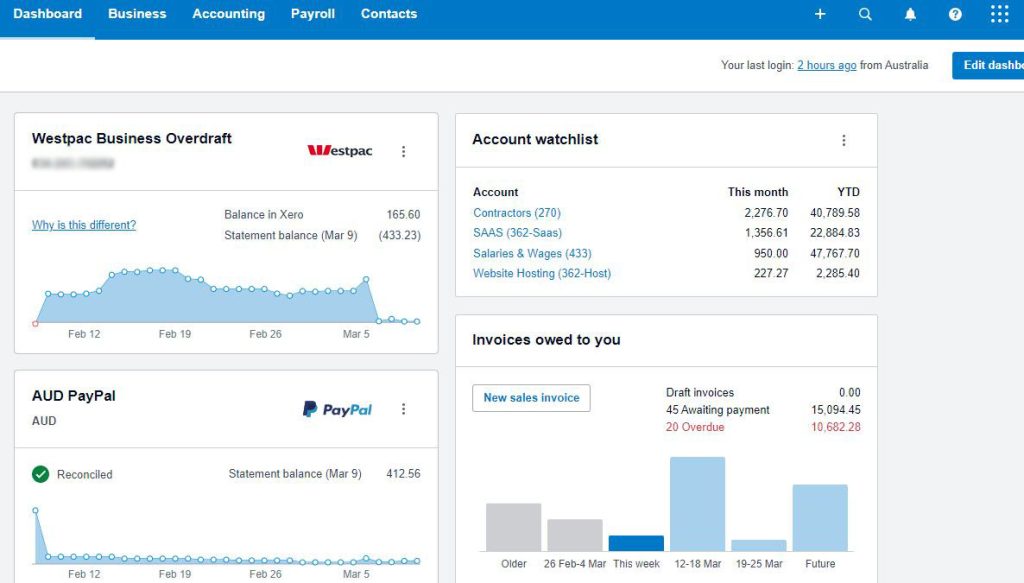
Navigating the Xero dashboard: A bookkeeper who is new to Xero will need to know how to navigate the dashboard, access different areas of the software, and customise their settings.
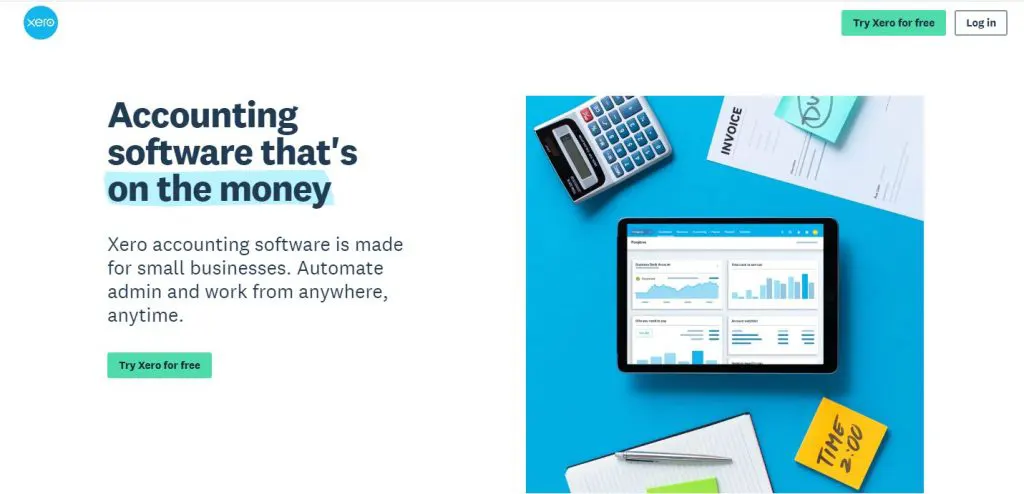
- Sign in to Xero: To access the Xero dashboard, you’ll need to sign in to your account at https://login.xero.com/
- Familiarise yourself with the layout: The Xero dashboard is divided into several sections, including a top navigation bar, a left-hand menu, and a main content area.
- Access different areas of the software: The left-hand menu is where you’ll find links to different areas of the software, such as “Accounts,” “Contacts,” “Invoicing,” and “Reports.” Click on one of these links to access the corresponding section of Xero.
- Customise your settings: Xero allows you to customise many aspects of the software, such as your invoice template, email settings, and chart of accounts. To access your settings, click on your organisation name in the top navigation bar, and select “Settings” from the dropdown menu.
- Explore the Xero app marketplace: Xero has a robust app marketplace that allows you to integrate with other business tools, such as payment processors, inventory management software, and time tracking tools. To access the app marketplace, click on “Apps” in the top navigation bar, and browse or search for the app you want to integrate.
- Get help and support: If you need help using Xero or have questions about the software, there are several resources available to you. Click on “Help” in the top navigation bar to access the Xero help centre, which includes user guides, video tutorials, and a community forum. You can also contact Xero support directly through the help centre.
Through these steps, you should be able to navigate the Xero dashboard and access the different areas of the software that you need to manage your client’s finances. Remember to take some time to explore Xero’s features and settings to see how you can customise the software to meet your needs.
Setting up clients: Bookkeepers can add clients to their Xero accounts, set up their chart of accounts, and create bank feeds to begin importing transactions.
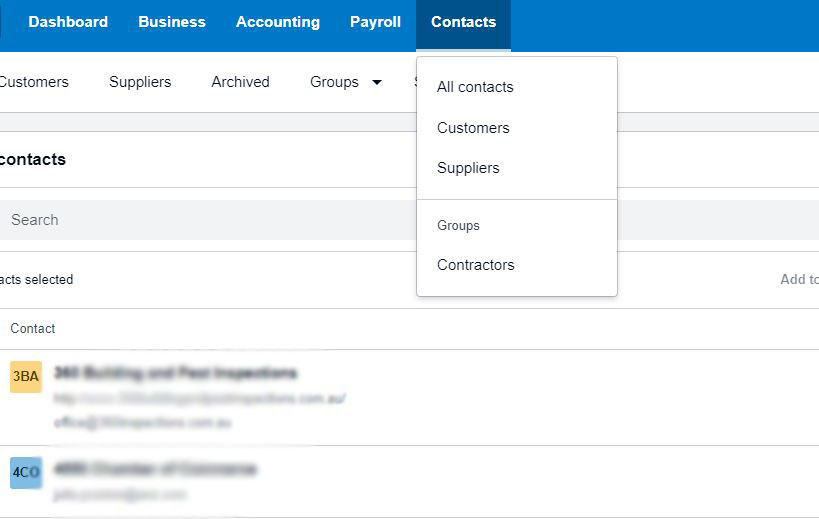
- Log in to your Xero account and navigate to the “Contacts” section.
- Click on the “Add Contact” button to create a new client.
- Enter your client’s contact information, including their name, email address, phone number, and mailing address.
- If your client is a business, you may want to add their business name and business number. You can also choose to set up a default accounts payable or accounts receivable account for this contact.
- Once you’ve added your client to Xero, you’ll want to set up a chart of accounts. This is a list of all the accounts that you’ll use to track your client’s finances, such as income, expenses, assets, and liabilities.
- To set up a chart of accounts, navigate to the “Accounting” section and click on “Chart of Accounts.”
- Click on the “Add Account” button to create a new account.
- Choose the account type (e.g., income, expense, asset, liability, equity) and enter the account name and code.
- Repeat this process for all of the accounts you’ll need to track your client’s finances.
- Once you’ve set up your chart of accounts, you can create bank feeds to begin importing transactions. This will allow you to see all of your client’s transactions in Xero and match them to the appropriate accounts.
- To set up a bank feed, navigate to the “Bank Accounts” section and click on the “Add Bank Account” button.
- Follow the prompts to connect your client’s bank account to Xero.
- Once you’ve set up a bank feed, Xero will automatically import your client’s transactions, and you can begin categorising them and reconciling your accounts.
Invoicing: Xero makes it easy to create and send professional-looking invoices to clients, and bookkeepers can set up recurring invoices to automate this process.
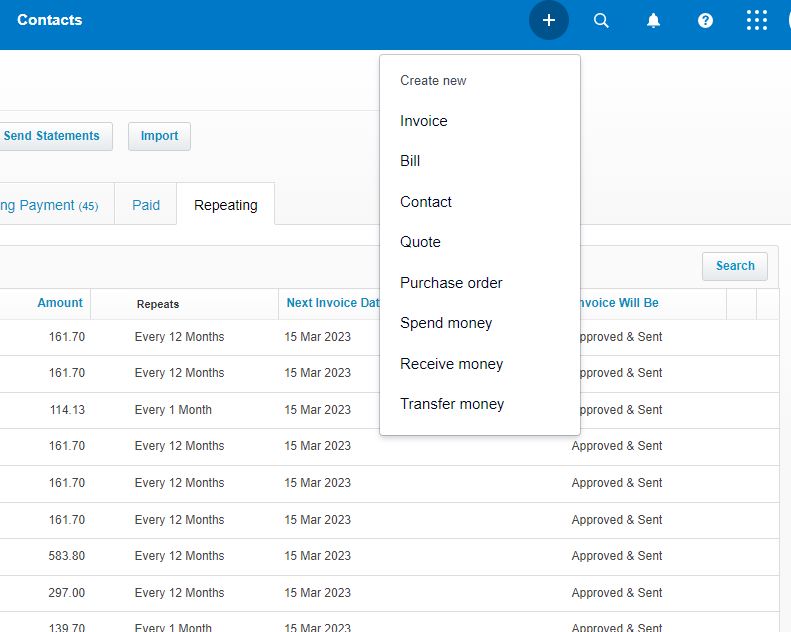
- Log in to your Xero account and navigate to the “Invoicing” section.
- Click on the “New Invoice” button to create a new invoice.
- Enter your client’s contact information, including their name and email address.
- Select the items or services you are invoicing for, and enter the quantity and price for each item.
- Add any discounts or taxes that apply to the invoice.
- Customise the invoice with your client’s logo, payment terms, and a personal message.
- Preview the invoice to make sure it looks professional and accurate.
- Once you’re ready to send the invoice, click on the “Send” button. You can choose to send the invoice via email or download it as a PDF to send by mail.
- If you have clients that you invoice regularly, you can set up recurring invoices in Xero to automate this process.
- To set up a recurring invoice, navigate to the “Invoicing” section and click on “Repeating Invoices.”
- Click on the “New Repeating Invoice” button to create a new recurring invoice.
- Enter the invoice details, including the client’s contact information, invoice items, and payment terms.
- Choose how often you want the invoice to be sent (e.g., weekly, monthly, quarterly), and set an end date for the recurring invoice.
- Customise the invoice with your client’s logo, payment terms, and a personal message.
- Preview the invoice to make sure it looks professional and accurate.
- Once you’re ready to activate the recurring invoice, click on the “Save and Activate” button.
With these steps, you should be able to create and send invoices in Xero, as well as set up recurring invoices to automate this process. Remember to customise your invoices with your client’s branding and payment terms to ensure they look professional and are easy for your clients to pay.
Bill payment: Xero allows bookkeepers to easily pay bills and track expenses, whether they’re paying by check, ACH, or credit card.
- Log in to your Xero account and navigate to the “Accounts Payable” section.
- Click on the “New Bill” button to create a new bill.
- Enter the details of the bill, including the supplier’s name, the due date, and the amount owed.
- Attach any supporting documents, such as receipts or invoices.
- Choose the account you want to pay the bill from (e.g., checking account, credit card account).
- If you’re paying the bill by check, you can print the check directly from Xero.
- If you’re paying the bill electronically, you can set up an ACH payment or use Xero’s integrated payment service to pay the bill by credit card.
- Once you’ve paid the bill, Xero will automatically update your accounts to reflect the payment.
- To track expenses, you can upload receipts or invoices directly to Xero and categorise them according to the appropriate account.
- To upload a receipt or invoice, navigate to the “Expense Claims” section and click on the “New Expense Claim” button.
- Enter the details of the expense, including the amount and the account it should be categorised to.
- Attach the receipt or invoice to the expense claim.
- Submit the expense claim for approval.
- Once the expense claim is approved, Xero will automatically update your accounts to reflect the expense.
With these steps, you should be able to pay bills and track expenses in Xero. Remember to customise your accounts payable settings, such as setting up payment terms or adding multiple bank accounts, to ensure your payments are processed smoothly.
Bank reconciliation: Reconciling bank transactions is a critical part of bookkeeping, and Xero
- Log in to your Xero account and navigate to the “Bank Accounts” section.
- Select the bank account you want to reconcile.
- Xero will display a list of all transactions for that account, including those that have been imported automatically from your bank feed.
- To reconcile a transaction, click on the checkbox next to the transaction.
- If the transaction matches an item in your accounting records, such as an invoice or bill payment, Xero will automatically suggest a match.
- Review the suggested match and make any necessary adjustments.
- If the transaction does not match an item in your accounting records, you can create a new transaction in Xero to record the expense or income.
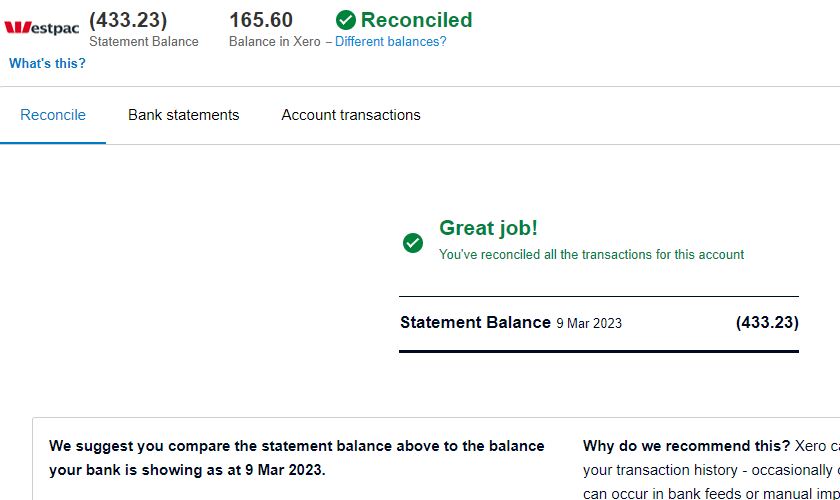
- Once you have reviewed and adjusted all transactions, click on the “Reconcile” button.
- Xero will automatically update your accounting records to reflect the reconciled transactions.
- You can also use Xero’s bank rules feature to automate the reconciliation process for recurring transactions.
- To set up a bank rule, navigate to the “Bank Accounts” section and click on “Manage Bank Rules.”
- Create a new rule and specify the conditions that must be met for the rule to apply (e.g., a certain payee, amount, or transaction type).
- Set the action that Xero should take when the rule applies (e.g., categorise the transaction, suggest a match).
- Save the rule, and Xero will automatically apply it to any future transactions that meet the specified conditions.
With these steps, you should be able to reconcile bank transactions in Xero and use bank rules to automate the process for recurring transactions. Remember to review your bank transactions regularly to ensure your accounting records are accurate and up-to-date.
Reporting: Xero offers a variety of built-in reports, including profit and loss statements, balance sheets, and cash flow statements, that bookkeepers can use to keep track of their client’s finances and provide valuable insights.
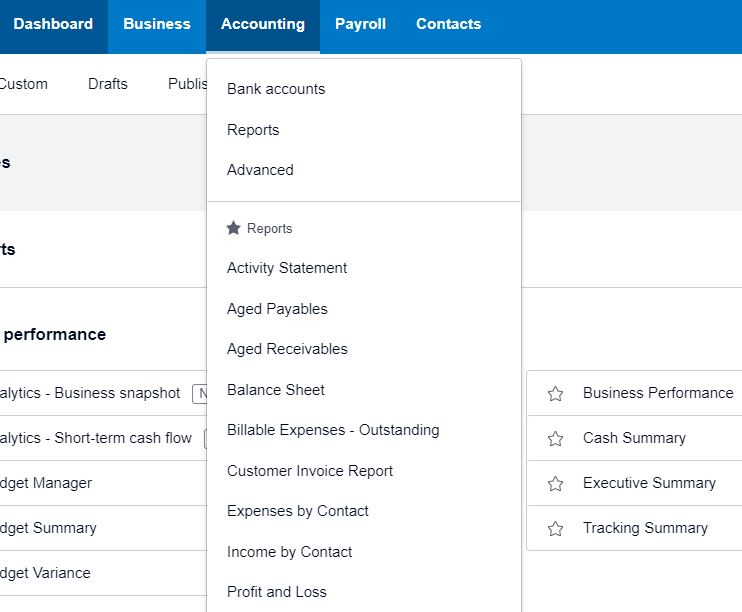
- Log in to your Xero account and navigate to the “Reports” section.
- Xero offers a variety of reports, including profit and loss statements, balance sheets, and cash flow statements. Select the report you want to run.
- Choose the date range for the report and any other parameters, such as the accounts or tracking categories to include.
- Xero will generate the report, which you can view on the screen, download as a PDF, or export to a spreadsheet.
- You can also customise the report by adding or removing columns, changing the sort order, or applying filters.
- Once you’ve customised the report to your liking, you can save it for future use or share it with your clients.
- Xero also offers a variety of dashboard widgets that provide real-time insights into your client’s finances. These widgets include cash flow graphs, accounts receivable and payable summaries, and bank account balances.
- To customise your dashboard, click on the “Edit” button at the top of the screen and add or remove widgets as desired.
- You can also set up alerts and reminders to keep you informed of important financial events, such as upcoming bills or overdue invoices.
With these steps, you should be able to use Xero’s built-in reporting features to keep track of your clients’ finances and provide valuable insights. Remember to customise your reports and dashboards to meet your clients’ specific needs and goals.
Integrations: Xero integrates with a variety of other business tools, including payment processors, inventory management software, and time tracking tools, making it easy to streamline bookkeeping tasks and improve overall efficiency.
- Log in to your Xero account and navigate to the “Settings” section.
- Click on “Add-ons” to view a list of Xero’s available integrations.
- Browse through the list of add-ons and select the tool you want to integrate with Xero.
- Follow the instructions provided by the add-on to set up the integration. This will typically involve granting the add-on access to your Xero account and configuring any necessary settings.
- Once the integration is set up, you can use the add-on to automate bookkeeping tasks and improve overall efficiency. For example, if you integrate Xero with a payment processor, you can automatically import payment data into Xero and reconcile transactions with your bank feed.
- Some popular Xero integrations include payment processors like PayPal and Stripe, inventory management software like Unleashed and Dear Inventory, and time-tracking tools like TSheets and Deputy.
- Xero also offers an API that allows developers to create custom integrations with Xero. If you have specific business needs that aren’t addressed by Xero’s built-in integrations, you may want to consider working with a developer to create a custom integration.
With these steps, you should be able to integrate Xero with other business tools and streamline bookkeeping tasks. Remember to choose add-ons that meet your specific needs and integrate them in a way that works best for your business.
In summary, Xero is a powerful accounting software that can streamline bookkeeping tasks and improve overall efficiency. As a bookkeeper, it’s important to master the basics of Xero, including navigating the dashboard, setting up clients, invoicing, bill payment, bank reconciliation, reporting, and integrations.
If you’re a bookkeeper looking to improve your skills with Xero, consider joining The Bookkeeper Hub’s online training portal. Our courses are designed to help you master Xero and other essential bookkeeping skills, including payroll, tax preparation, and financial analysis.
By joining The Bookkeeper Hub’s online training portal, you’ll have access to a variety of resources, including video tutorials, live webinars, and interactive quizzes. You’ll also have the opportunity to connect with other bookkeepers and industry experts and gain valuable insights and feedback.
So if you’re ready to take your Xero skills to the next level, join The Bookkeeper Hub’s online training portal today. We look forward to helping you succeed!


